In this tutorial you will find the instructions for making an 18” square outdoor pillow. Even if you are a beginner, we think you will find this an easy sewing project. We used Velcro for the closure, so there is no zipper to sew.
We asked our wonderfully talented Mom, who has been sewing for a long time, to help us design and sew this pillow cover. The pillow cover is designed with a flange border. The Velcro closure is concealed within the flange of the pillow cover opening.
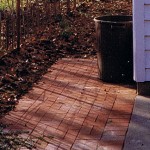
We selected a fabric with stripes in a rich green and deep red to use on my front porch bench for the Christmas season. Although, we think it would be a beautiful pillow to enjoy year round.

Fabric and Supplies Needed –
- Outdoor pillow insert, 18” square
- Outdoor weather resistant fabric 54” wide, 2/3 yard
- Velcro, 3/4” wide, 16” long
- Polyester Thread, heavy duty (Tip: for solid material, select a thread color one shade darker than the material color; for a stripe or patterned material, select a thread color that matches the most dominant color in the material)
How to Make the Pillow Cover –

Step 1 –
If you are using a stripe or pattern fabric striped or patterned place the pillow on the fabric to determine how the stripes or pattern will be positioned on the pillow. Then cut 2 pieces of fabric 21” wide by 21 1/2” long. The final pillow cover will be square but the 1/2” extra in length is to accommodate the hidden Velcro closure in one of the flanges.
Tip: If your fabric has a tendency to ravel at the ends, sew a zigzag or straight stitch on all cut or raw edges.

Step 2 –
On the right side of the fabric, center the 16” long Velcro strip along the 21” width placing the Velcro edge 1/4” in from the fabric edge. Sew the Velcro to the fabric stitching it along all four edges of the strip.


Locating the Velcro Strip
Step 3 –
Next place the 2 pieces of fabric together with the right sides facing each other matching up the edge widths and pin together. Start the seam at one end of the Velcro and end it at the other end. The Velcro side will have a 1 1/8” seam and the remaining sides will have a 5/8” seam. Slightly round the seam at all corners (see sketch in step 4). Press open the seams.

5/8 Stitch
Step 4 –
Cut the seam allowance, at all 4 corners, ¼” from the seam which will allow for a crisp corner when you turn the pillow cover right side out. Turn the pillow cover right side out and press the outer edges to make a flatter edging (the fabric will be easier to work with when the edges are pressed).

Wrong Side Corner Treatment
Step 5 –
Now fold in both sides of the open Velcro ends of the cover toward the inside so that the edge of the Velcro is 1/8” from the folded finished edge. This will form the flange with the hidden Velcro closure (see Step 6).

Folded Finished Fold – Velcro side
Step 6 –
Create the 7/8” flange with the fabric right side out.

7/8” Flange Seam
Using pillow accents can really make a space pop. This pillow design would be a beautiful accent for decorating any outdoor or indoor living space.

Join The Fun! – Metamorphosis Monday ; Frugal Friday ; Delightfully Inspiring